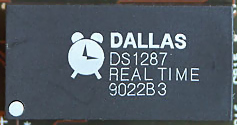
Dallas DS1287 RTC
The PS/1 Model 2011 uses the Dallas DS1287 Real Time Clock chip, which is a self-contained subsystem that includes battery, real time clock, and memory.
The DS1287 chip is out of production since a couple of decades now. There’s a good chance that the RTCs you can find on %famous_auctions_site% are old pulls and already dead (or very close to be), and even if they’re new old stock they’ll die sooner rather than later.
The DS12887 chip seems to be a recent, pin compatible replacement for the DS1287, although not 100% equivalent (128 bytes of memory instead of 64 bytes). I’ve never personally tested it, but people had success using the DS12887 as a replacement on the IBM PS/1.
Another, long lasting solution is a battery retrofitting, ie. exposing the internal contacts and soldering a standard CR2032 battery holder on top.
Locating the DS1287 chip
On the PS/1 Model 2011 the RTC chip is located on the right side of the motherboard, under the HDD bay.
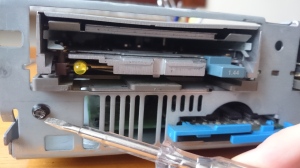
In order to remove the drive bays and gain access to the motherboard you’ll need to:
- remove the HDD: unplug it and while pressing the frontal tab slide it outwards.

Press the tab and slide outwards.
- unplug the FDD and remove it in the same way as you did for the HDD
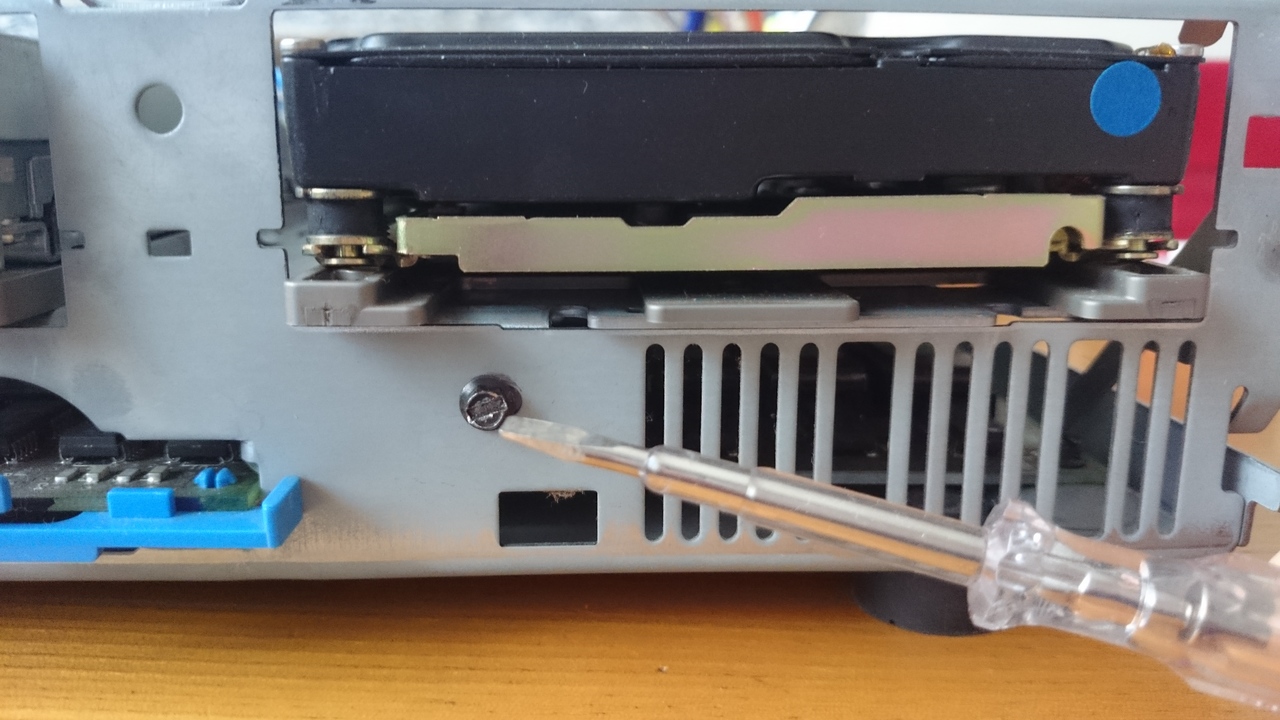
- remove the 2 screws on the front panel, 1 below the HDD bay, and 1 below the FDD bay

The screw under the HDD bay
The screw under the FDD bay
- remove the screw on the motherboard that’s between the drive bays
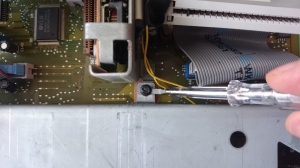
The screw on the motherboard


With everything unplugged and unscrewed you can now remove the drive bays pulling the metal shelf upward.

Dallas RTC ship on a US planar
Retrofitting a CR2032 battery holder
On every PS/1 2011 planar I saw the Dallas chip was socketed. So assuming yours is also socketed, gently remove the chip helping yourself with a flat screwdriver.
There are plenty of guides on the net that explain how to solder a battery holder on top of the RTC chip, so I won’t repeat the whole process here. Also, I don’t want to be held responsible for any damage that might occur to your precious PS/1.
Here’s a good guide:
http://www.mcamafia.de/mcapage0/dsrework.htm
(copy of the same page for posterity: http://archive.is/FNh4s)
Here’s another:
http://www.classic-computers.org.nz/blog/2009-12-05-repairing-a-dallas-chip-in-a-compaq-slt-286.htm
If you prefer a video instead, here’s one from Foogle Stuff:
https://www.youtube.com/watch?v=k_n7FxaBlq8
The final result should look like this:
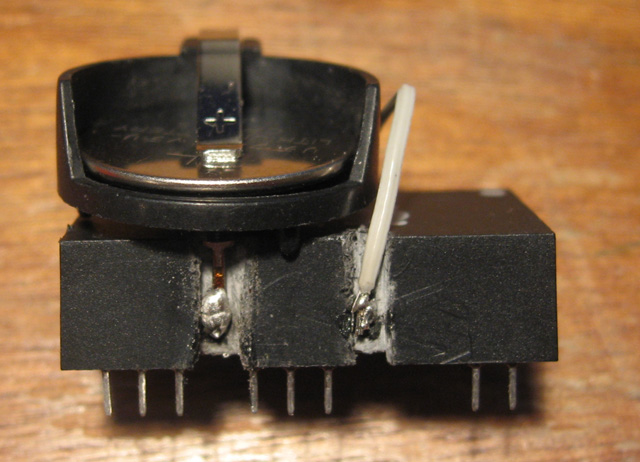
Image taken from http://www.classic-computers.org.nz
